

Purchasing full size targets for different drills can get costly. These targets that I've designed are free to you, your department, unit, or even other trainers to download and utilize. Click the link button to the right of each description, save it, print it, make as many copies as you want, and get out and train.
I've provided a plan and how to use each one to ensure you are getting training value from them. If you want to use them for another purpose in your training, have at it.
Outside of the range, set them up around your office, house, team room or wherever to be utilized for dry fire practice.
"Confidence only matters when its tested. Be prepared."
-Seth, @dochuhn
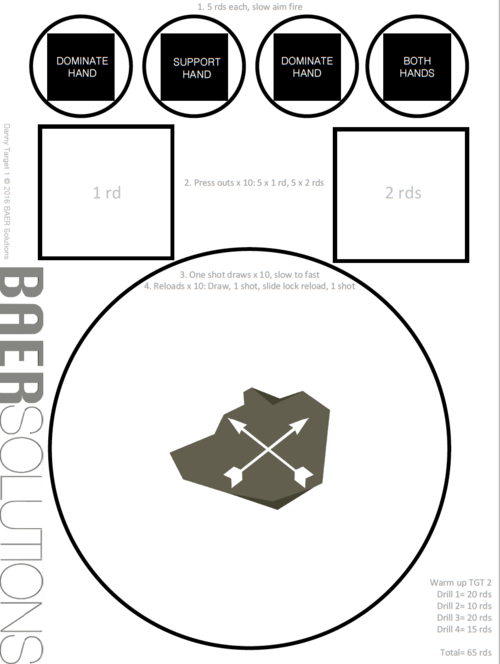
BAER SOLUTIONS STANDARDS TARGET, aka "baer" target
The standards target was created to gauge your performance first thing in your training and at the end. We don't get to warm up in real life so this is shot cold, meaning no warm up. Suggested distance is 5 meters. As with anything, once you have gotten good at it go ahead and move back to 7 or even 10 if you can. If you miss, you fail, so be accountable for your rounds. 9 seconds or faster is passing. Ensure progress in your training. Getting complacent or comfortable keeps us stagnant, always strive to get better.
From the holstered position, hands off of gun at sides, on signal draw and engage left or right 6" x 3.5" rectangle with 5 rounds.
Transition to other rectangle and engage with 5 rounds.
Perform slide lock reload and engage center circle with 3 rds.
Perform drill with 10 rd magazine first, 3 rd magazine second, and have a full mag prepared to get gun back up after drill.
Once drill is completed, ensure you perform another slide lock reload to get your gun up and scan your sector/threat area.
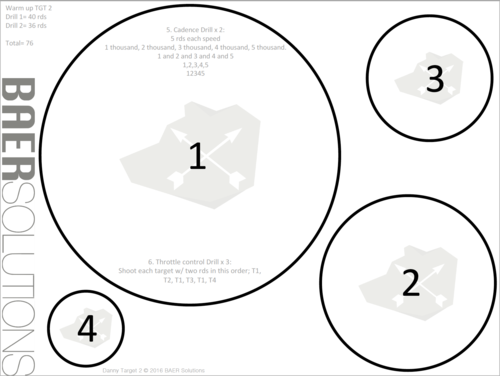
BAER SOLUTIONS WARM UP TARGET, AKA "DANNY" TARGET
This target was designed to provide a plan for your warmup drills with 150 rds for your pistol, but can be used with rifle too with some modification. This target is a good way to ensure you are hitting as much of the different facets of your training as possible. By doing the drill in order, you will progress from slow aim fire to weapon manipulation to cadence and throttle control.
Target 1 works on training your sight alignment and trigger squeeze through slow aim fire, draws, reloads, recoil management and well aimed follow up shots after the reload. All drills are started from the holster with the exception of the first and second. Drill one establishes your correct grip and trigger squeeze, and drill 2 works on your sight acquisition and presentation to progress into your draw stroke. Drills three and beyond are all from the holster working draws and reloads. Remember that each drill builds on the previous one. What you reinforce in one drill should be carried over to the next.
Target 2 trains on the more advanced aspects of shooting such as cadence, recoil management, and throttle control. Drill 5 is to determine the speed you can accurately hit different sized targets. This is accomplished through the use of your "cadence" which is explained on it. Count them out loud and break each shot as you say the number. Throughout this drill reset your trigger and get your sights back on target quickly. Think about resetting your trigger and sights as the slide moves back forward chambering a round. Drill 6 is a throttle control drill which mimics having a close target and others at different distances which will require more well aimed shots. Your largest target should be with faster split times and the smaller ones will be potentially slower depending on size.
For use with a rifle, you can modify Drill 1 for dominant and non-dominant sided shooting by transitioning to each shoulder between dots. Don't forget to apply proper hold overs for the distance you are shooting at.
Drills I provided are a guide, so feel free to use them as needed to accomplish your training goals. Other drills you can do are "Check" Drills or set up several of them to target transitions when you are limited on range space.
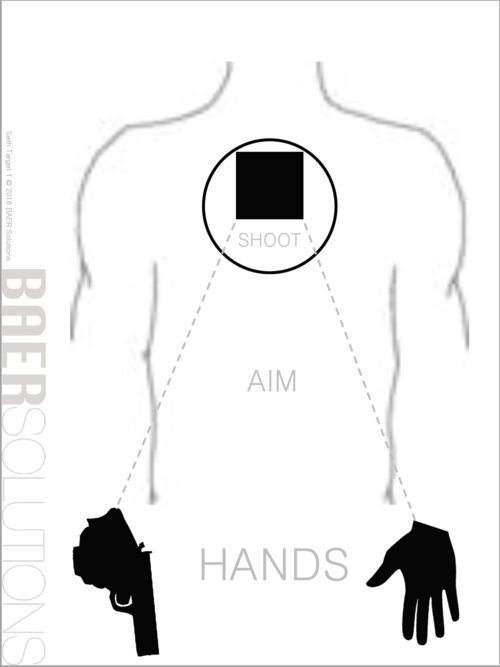
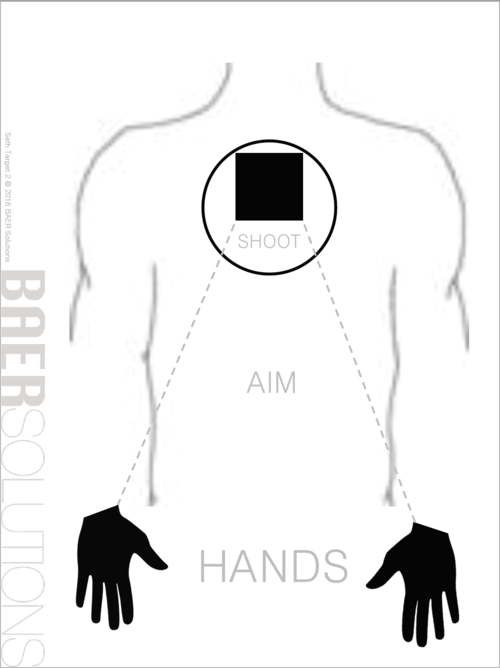
BAer Solutions Target ID Primer, AKA "SETH" Target
The Target ID Primer is a target to get you in the mindset of target identification for the remainder of your training session. The Target ID Primer doubles as both a warm up and a process to practice the Hands, Aim, Shoot method of target identification. You can prime yourself to think about proper target identification practice from the start so you are not at a loss when one of your future drills, or real world scenarios, calls for it.
The common problem with normal flat range training is that it only trains marksmanship which can create unwanted effects when it comes time to have to discern a threat before engaging it.
By priming your brain to think in terms of identifying a target, narrowing your focus while aim, and applying proper fundamentals to shoot, you can maximize your training session as it applies to most situations that you will encounter. After all, shooting any target, whether it’s a bulls eye on a flat range or a live threat in the real world, requires that you identify it, focus your aim, and apply sound fundamentals.
The target does not replace dynamic, simulated training with threat and non-threats, but can aid in creating the right mentality for any training session.
To get the most out of your warm up, print both of the following pages. Find a “Focus Point” above the target in the traditional head zone of the target backer. Give yourself a mental verbal of “left” or “right”. Shift your visual focus from the focus point to the hands. If you see a threat, practice your slow, methodical draw, refine your visual focus up as you bring your sights into your line of vision, shift your visual focus from the target to the front sight, taking the slack out of the trigger to the wall, confirm your aim, and squeeze the trigger.
If you don’t see a threat, give yourself a verbal cue indicating no threat and shift your focus back to the “Focus Point”.
Be diligent and mindful the of the Target ID process as you complete your warm up rounds. Allow yourself mental room to make procedural adjustments for missed shots then refocus back to target ID for the next shot.
*This primer target was created with assistance from a SOCOM Mental Performance Coach with advanced degrees in psychology and behavior.
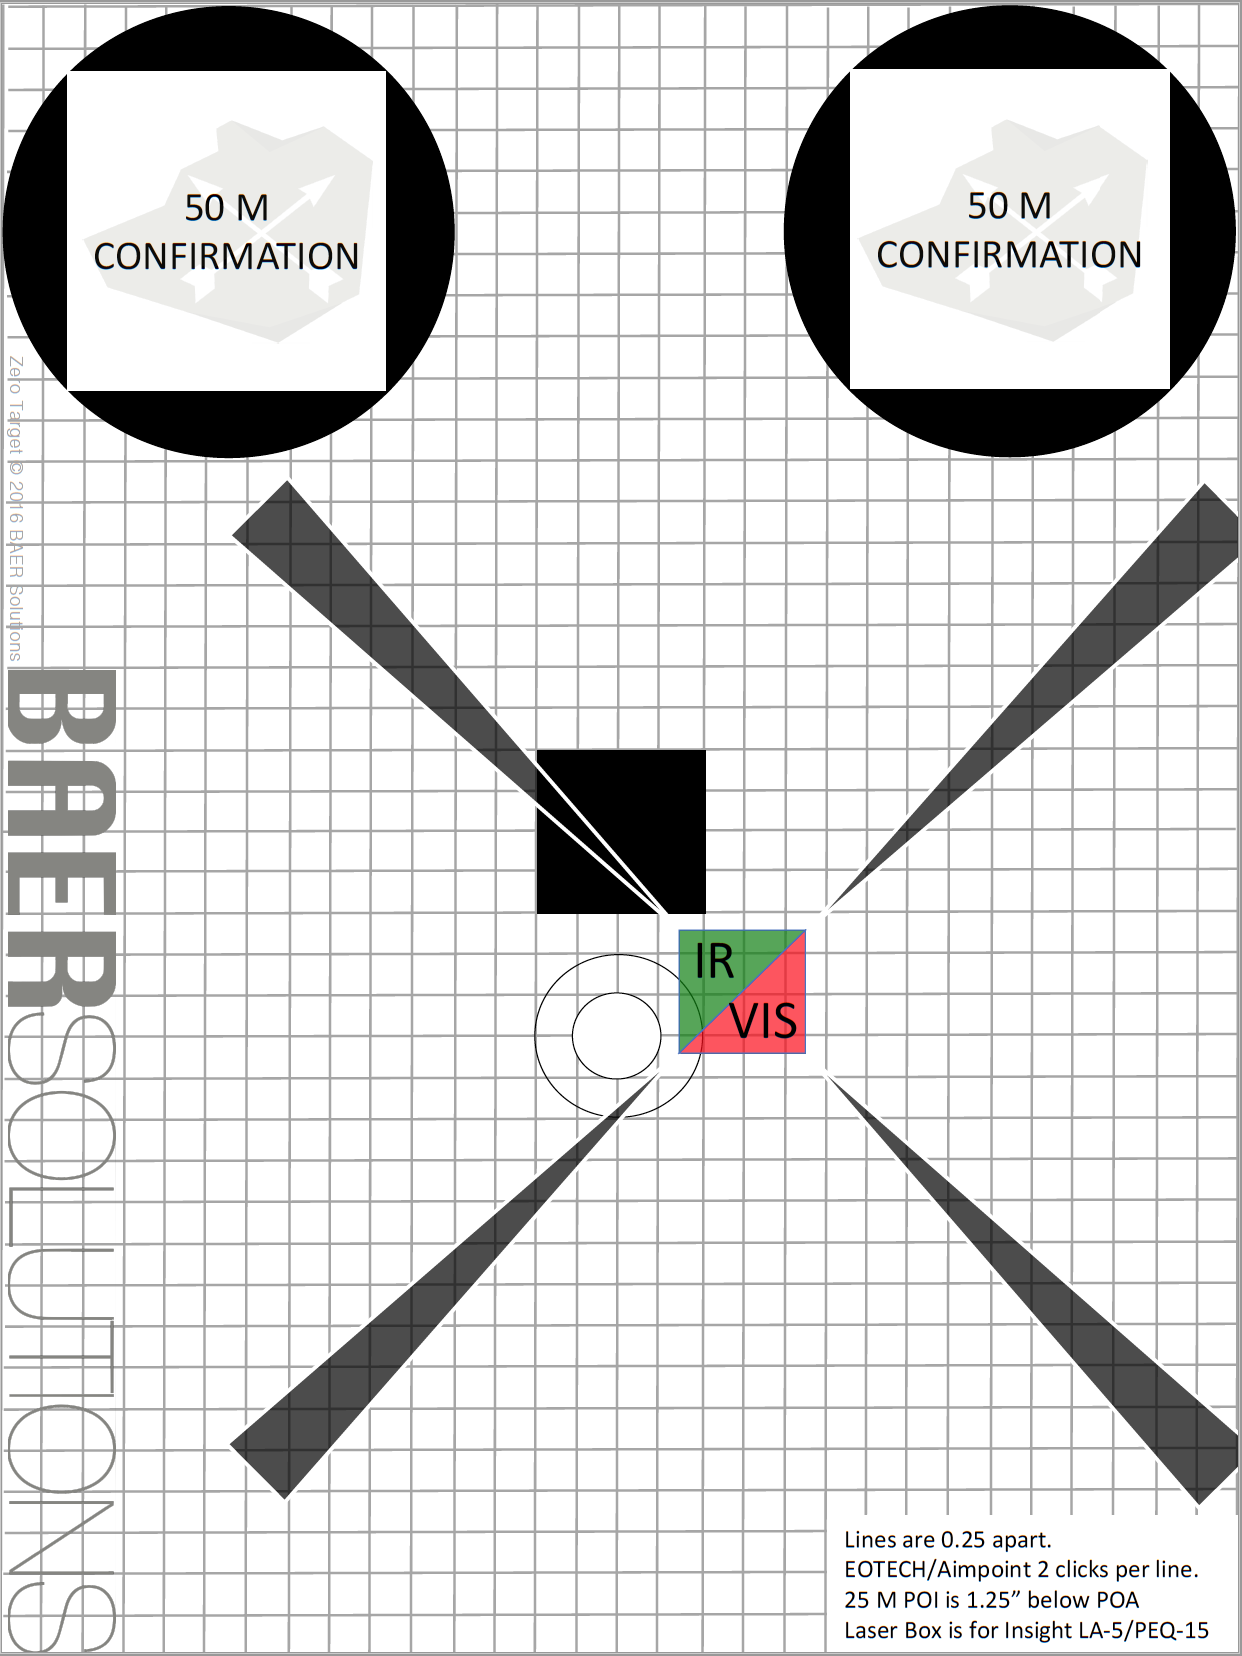
BAER Solutions Zero Target
This target was designed to save time zeroing your optic and laser at 25 meters. The black box in the middle is your point of aim for a 50/200 zero with the rounds impacting in the circle below. Laser box is for the Insight LA-5/PEQ-15 model visible red and IR lasers to provide a constant offset setup to your line of sight.
Zero main optic at 25 meters
Adjust laser vis laser into box, while maintaining point of aim.
Confirm optic zero at 50 meters with larger circles on top. Point of impact is point of aim at this distance.
At night, apply glint tape to laser square and confirm rounds are still in circle at 25 meters. Best to be done at dusk for maximum visibility.
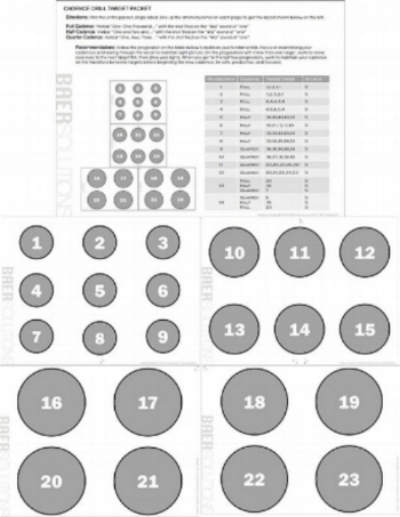
BAER Solutions Cadence Target AKA "DocHuhn's Cadence"
Cadence and rhythm are specific drills that many of the best shooters practice to improve their sight tracking through their shot string. You need to be able to track the sites on a single target and multiple ones.
The Cadence Drill is designed to develop and test intermediate pistol fundamentals. Once you’ve established some mastery of the fundamentals of grip, sight picture, and trigger squeeze on a single target, the next step in the progression is to put those fundamentals in action. The cadence drill is one effective way to start to build practical fundamentals.
Directions are on the first page of the print out and contain multiple options for how to train on the different sized dots. They can even be used as just dots for your training in addition to the methods outlined here.
Read and follow the instructions on the first page.
Line up the targets as shown with the marking hashes.
Train.
BAER SOLUTIONS DRY FIRE TARGET AKA “JOE” TARGET
Dry fire is critical. We need to do it, and we need some targets. These are a good, if you want better ones go check out Frank Proctor’s dry fire targets or Tim Herron’s which you can order through their sites. They’re better, cardboard, and have other options. Use these as much as you want, feel free to support them too.
First page is an idea sheet. Just some suggestions but at the end of the day, you can mix it up and do whatever you want.
There are 12 different types of targets, each one has a different purpose.
Set them up, shoot them all different ways, don’t forget to reinforce your fundamentals and basics.
With dry fire, the only thing you don’t get is the recoil impulse and reset of the trigger. You have to keep this in mind as you train so that your grip is the same dry as it is live.
Enjoy and get to work.
